
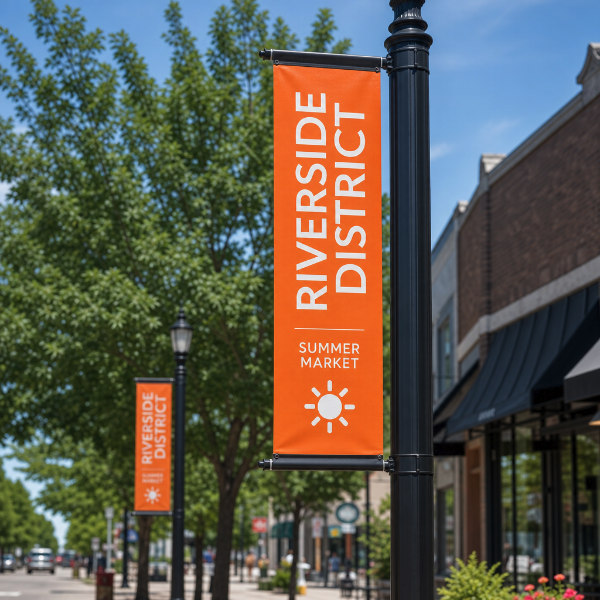
Pole and boulevard banners are the tall, narrow banners you see mounted on light standards and lamp posts along a street — municipal seasonal displays, downtown business associations, campus wayfinding, festival and event routes. They mount top and bottom on horizontal arms, which is what keeps them flat and stops them wrapping around the pole in wind.
Printed on 18oz vinyl, because these live outdoors for a full season or longer and are a nuisance to swap out once a crew and a lift have gone home. The heavier material holds its shape under constant wind load far better than standard 13oz.
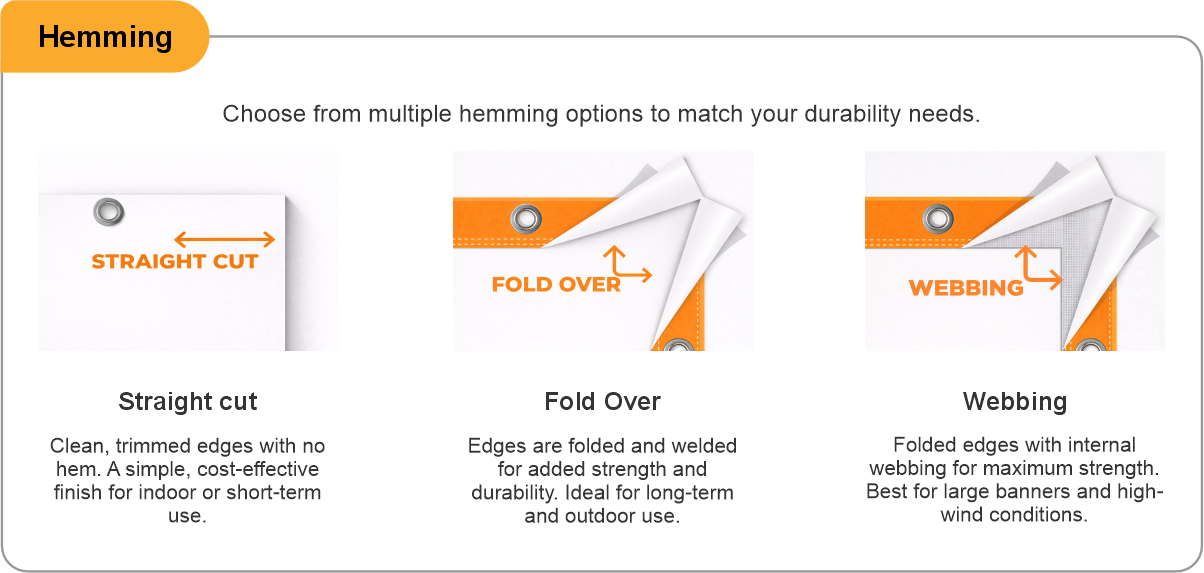
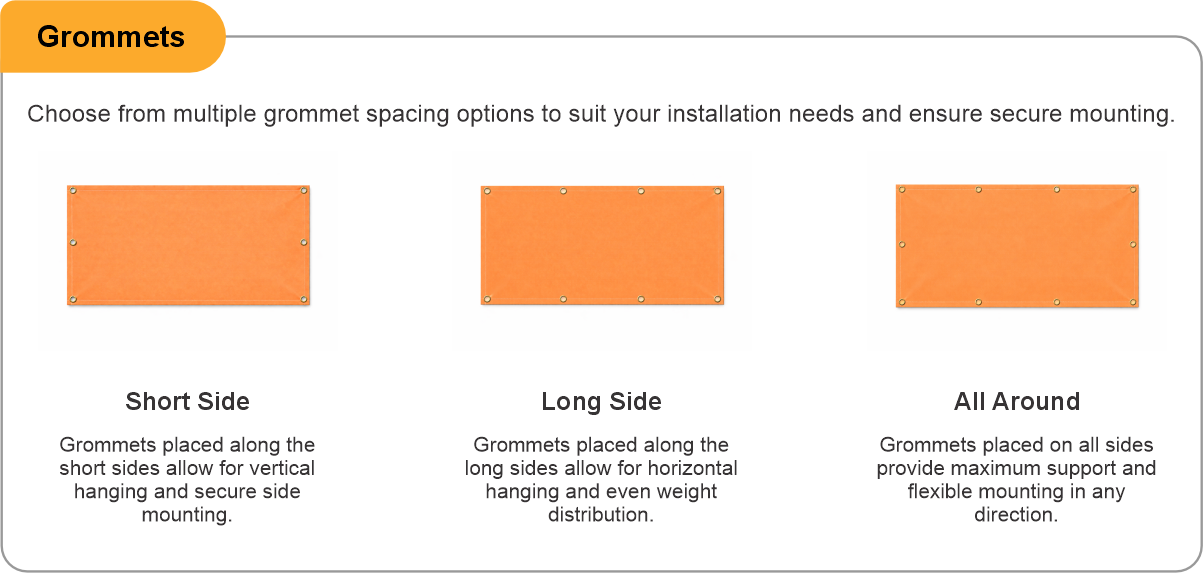
Choose pole pockets on the short sides for the standard top-and-bottom arm mount. Pockets take a rod or crossbar through the hem, spreading the load across the whole width rather than concentrating it on a few grommets. If your hardware uses side-mounted arms instead, choose long sides.
Wind slits are worth considering on exposed routes and anywhere the banner sits high above a road. Confirm your bracket spacing before ordering — the finished pocket size has to match the rod diameter your hardware uses, and the banner height has to match the arm separation.
These are typically ordered in matched sets, so keep artwork consistent across the run and supply at full size where possible, or to scale at 100 dpi or better. Keep important text and logos at least 2 inches inside the trim edge so nothing disappears into the pocket hem.
- Use the product template or file setup guide when one is provided.
- Remove all hidden layers, guides, dielines or artwork that is not intended to print.
- Submit each project as a single, print-ready PDF. For multi-page files, all pages should be the same size and placed in the correct order.
- Make sure the file dimensions and orientation match the product being ordered.
- Avoid placing borders too close to the finished edge, as minor movement during trimming may make them appear uneven.
- For bleed, follow the margins provided in the product template. Keep important text, logos and design elements safely inside the trim line.
- Artwork should be high resolution, set to CMYK and supplied at 300 DPI whenever possible.
- Use C0, M0, Y0, K100 for small black text. For larger areas of deep black, use C30, M20, Y20, K100.
- Convert all fonts to outlines or ensure they are properly embedded in the PDF.
- Review your artwork carefully before uploading. Files are printed using the information provided, and colour may appear differently on screen than it does in print.
To start, select the product size, preview the design guidelines, download the guidelines for reference, and proceed with the customization options.
Pole & Boulevard Banners (Outdoor)
Customize & Estimate
Explore Complements
Related products
Enhance your experience with perfectly paired, high-quality related products.

 Issue?