
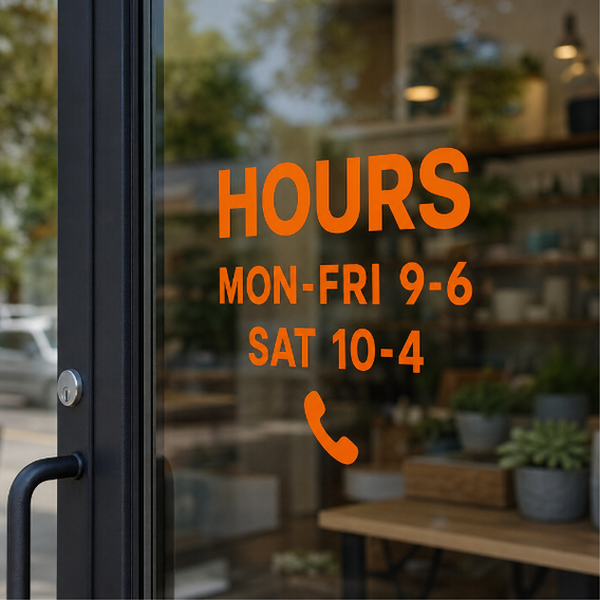
The small printed decals that live on a door and the glass beside it: opening hours, phone number, email, website, the cards you accept, delivery and collection times, a QR code for the menu or the booking page, and the short practical notices that save someone asking. Everything a customer checks in the two seconds before they push the door.
Full-colour print on adhesive vinyl, cut to the size you order — order by entering the finished width and height of the decal. Most hours panels land somewhere around eight to twelve inches wide, which is enough to read from the pavement without dominating the door. What arrives is the printed decal itself, cut to the size you ordered on its backing sheet and ready to apply; installation is not included.
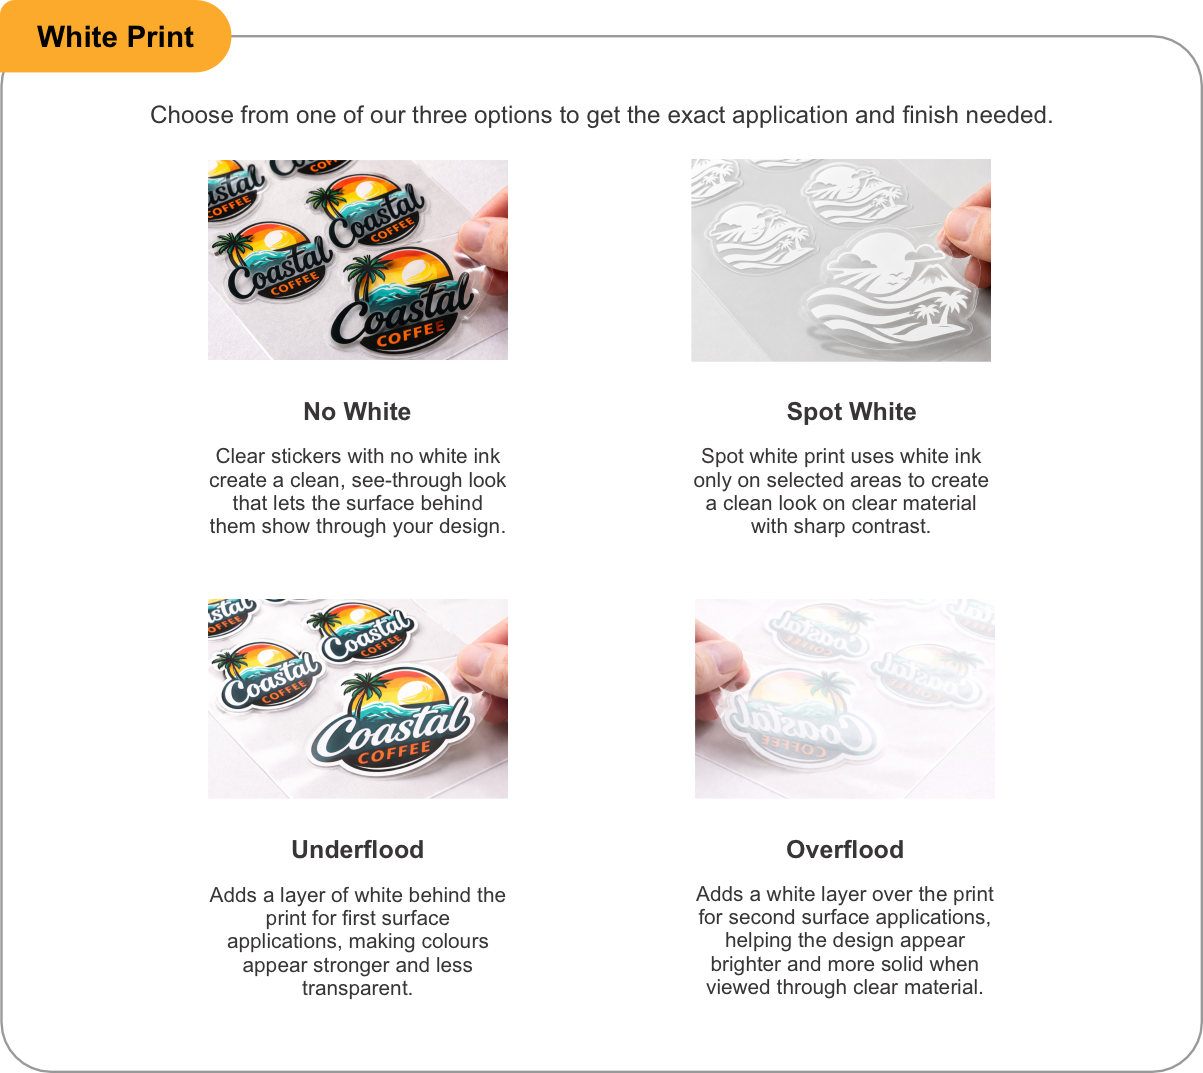
Three films. Clear Spot On and Clear Permanent are clear, so only the ink shows and the glass stays glass — usually the neatest look on a door. Clear Permanent is the one for information that is not going to change. 3M-IJ175 is an opaque white cast film, and it earns its place when the inside of the shop is visually busy: small type over a clear film competes with whatever is behind the glass, and a solid white panel makes it legible again.
Reverse Printed mirrors the artwork so the decal can go on the inside face of the door and still read correctly from outside. On a door that gets pushed, cleaned and weathered every day, that is the difference between a decal that still looks new next year and one with a lifted corner by spring. Printed White puts a white ink layer behind the colours on the clear films so they hold their density.
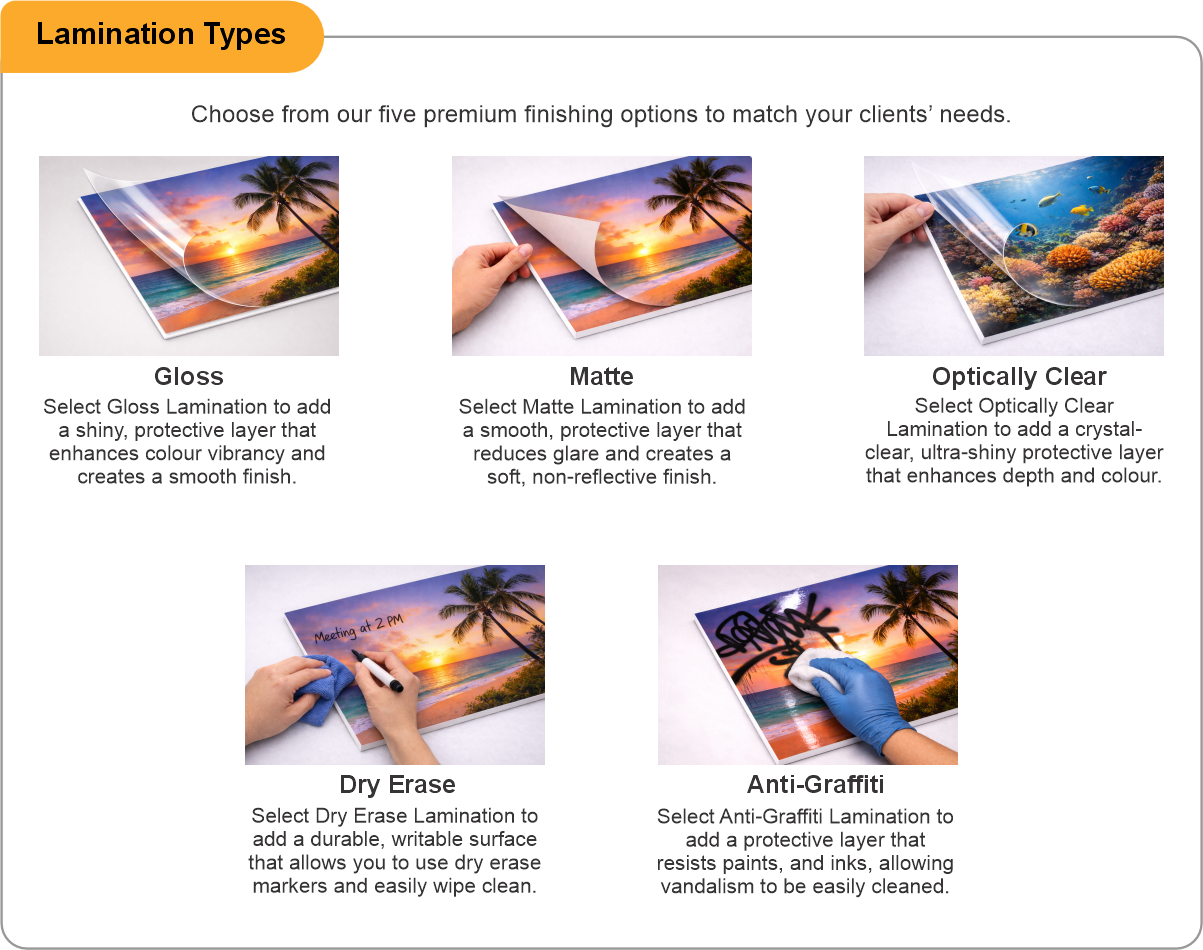
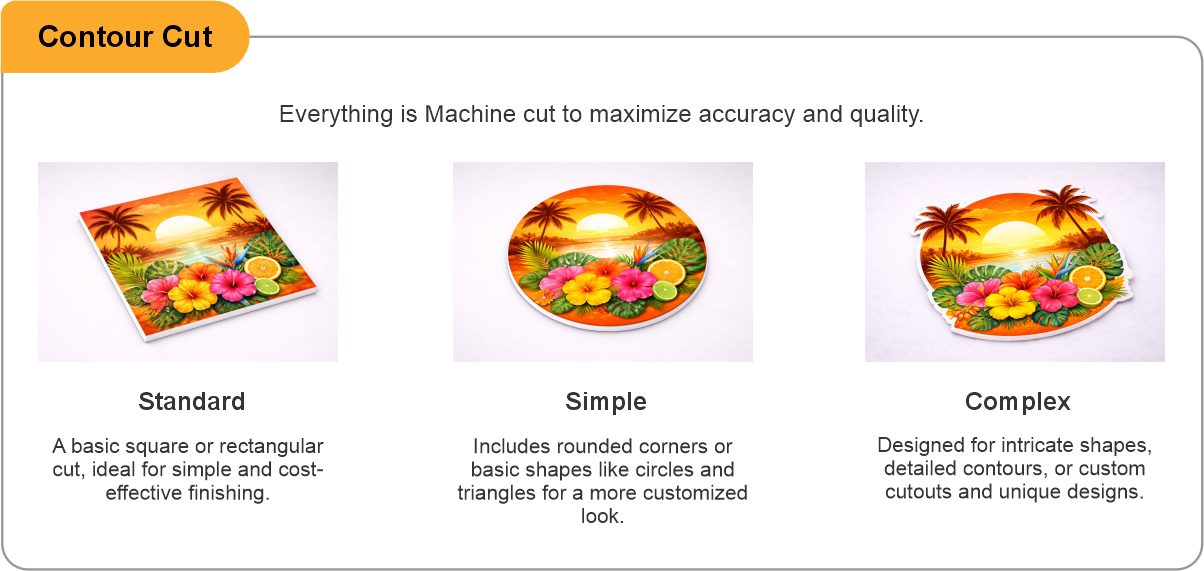
Contour cut for a shaped decal — a rounded panel, an icon, a logo outline — and lamination in gloss, matte, optically clear, dry erase or anti-graffiti where the door faces the sun.
Two pieces of practical advice. Fine type is where clear film costs you, so if the interior behind the glass is cluttered, choose the white film or design a printed white panel behind the text rather than fighting it. And if part of the information changes seasonally, order the hours panel as a separate decal from the permanent contact details — then you only replace the one that moved, and the door does not end up a patchwork of mismatched vinyl.
- Use the product template or file setup guide when one is provided.
- Remove all hidden layers, guides, dielines or artwork that is not intended to print.
- Submit each project as a single, print-ready PDF. For multi-page files, all pages should be the same size and placed in the correct order.
- Make sure the file dimensions and orientation match the product being ordered.
- Avoid placing borders too close to the finished edge, as minor movement during trimming may make them appear uneven.
- For bleed, follow the margins provided in the product template. Keep important text, logos and design elements safely inside the trim line.
- Artwork should be high resolution, set to CMYK and supplied at 300 DPI whenever possible.
- Use C0, M0, Y0, K100 for small black text. For larger areas of deep black, use C30, M20, Y20, K100.
- Convert all fonts to outlines or ensure they are properly embedded in the PDF.
- Review your artwork carefully before uploading. Files are printed using the information provided, and colour may appear differently on screen than it does in print.
To start, select the product size, preview the design guidelines, download the guidelines for reference, and proceed with the customization options.
Hours & Contact Decals (Promotional Window Graphics)
Customize & Estimate
Explore Complements
Related products
Enhance your experience with perfectly paired, high-quality related products.




 Issue?